
How to Make a Small Bedroom Look Bigger: 10 Tricks

You've removed the laundry basket, pushed the chair into a corner, and still the bedroom feels as if the walls are closing in. The problem usually isn't the actual floor area. It's the visual weight packed into the room, especially around the bed, along the floor, and in the main sight line from the doorway.
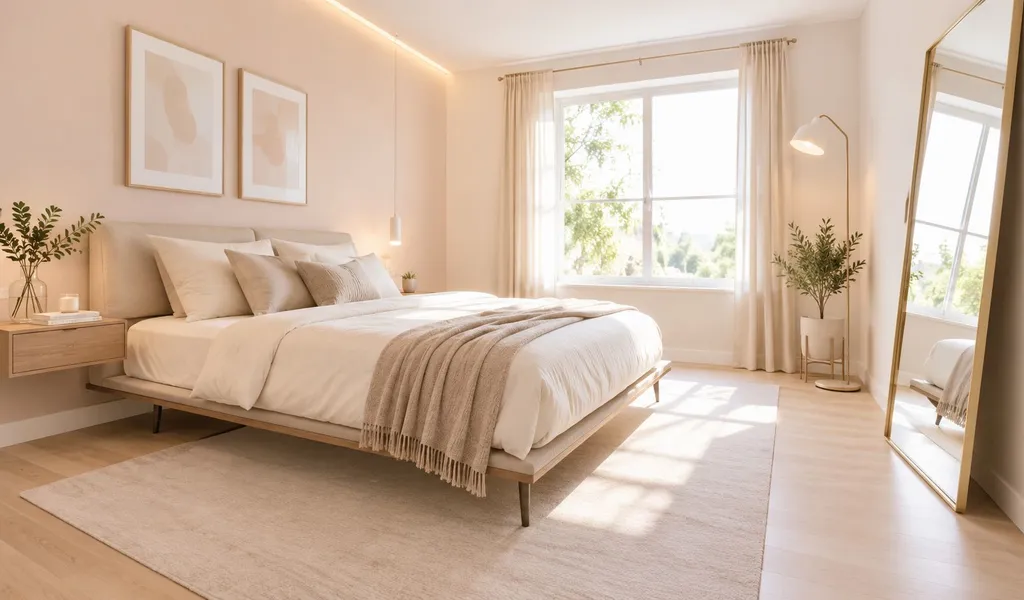
Staging a small bedroom is a 3D exercise. You're arranging what the eye sees first, what it can see underneath, and how easily it can travel from one surface to another. The right paint helps, but a carefully placed bed, an open walking path, and controlled light usually make a more convincing difference than another decorative object.
Table of Contents
- The Reality of Staging a Small Bedroom
- Choosing Furniture That Respects the Scale
- Painting for Spaciousness Without Boredom
- Strategic Mirror Placement and Reflection
- Layering Light to Eliminate Shadows
- Taking It From Concept to Completion
The Reality of Staging a Small Bedroom
A buyer pauses in the doorway and sees a chair buried under clothes, a crowded dresser, and a bed that blocks the room's depth. That first view sets the scale before anyone measures the floor area. In cramped bedrooms, visual weight comes from the volume and density of objects, not only their dimensions. Research on interior perception suggests that furnishing can reduce perceived spaciousness, although results vary by experimental setting (research on furnishings and perceived room size).
Stand in the doorway before moving the bed or selecting artwork. Follow the main sight line and identify the first three objects it reaches. A laundry hamper, overfilled dresser, or clothing-covered chair can make the room feel smaller because each interrupts the view across the floor and toward the far wall. Remove those obstructions first.
Clear the room in the right order
Take out anything that does not support sleeping, storage, circulation, or a deliberate visual purpose. Every object should earn its place in the room's three-dimensional arrangement.
- Remove unused furniture first. An extra chair, narrow bookcase, or spare side table may occupy little floor area yet create a heavy block in the sight line.
- Empty exposed surfaces. Keep only items that explain the room, such as a lamp, a small book, or one restrained decorative object.
- Reduce soft clutter. Piled blankets, excessive cushions, and hanging garments add bulk to the bed and pull the walls visually inward.
- Open the floor. Move shoes, storage boxes, and baskets away from the walking route, even when they are technically organized.
Aim for a bedroom where the floor, wall area, and window remain easy to read. A furnished room can feel less spacious than an unfurnished version, depending on the furniture and viewing conditions. A tall stack narrows the apparent wall, while low clutter breaks the floor's visual continuity.
One practical staging rule is simple: if an item makes the room easier to use but harder to read, hide it, relocate it, or remove it for the viewing.
After clearing the room, reassess from several positions. From the doorway, the far wall should remain visible. From the bed, the window should not sit behind a stack of furniture. These open views give the room depth, even before paint, mirrors, or additional lighting enter the plan.
Choosing Furniture That Respects the Scale
A bed can physically fit in a bedroom and still overwhelm it. The common mistake is choosing the largest mattress and frame that the room will accept, then trying to recover the lost openness with mirrors and pale paint. Start with the room's circulation and sight lines instead. The bed should leave a usable route around it, not force every movement into a narrow squeeze.
A low-profile bed frame reduces the height of the largest object in the room. That leaves more wall visible above the mattress and creates a cleaner horizontal line, which can make the ceiling feel less compressed. Furniture with visible legs has a similar effect because light and floor remain visible beneath it, rather than the room reading as a collection of solid blocks.
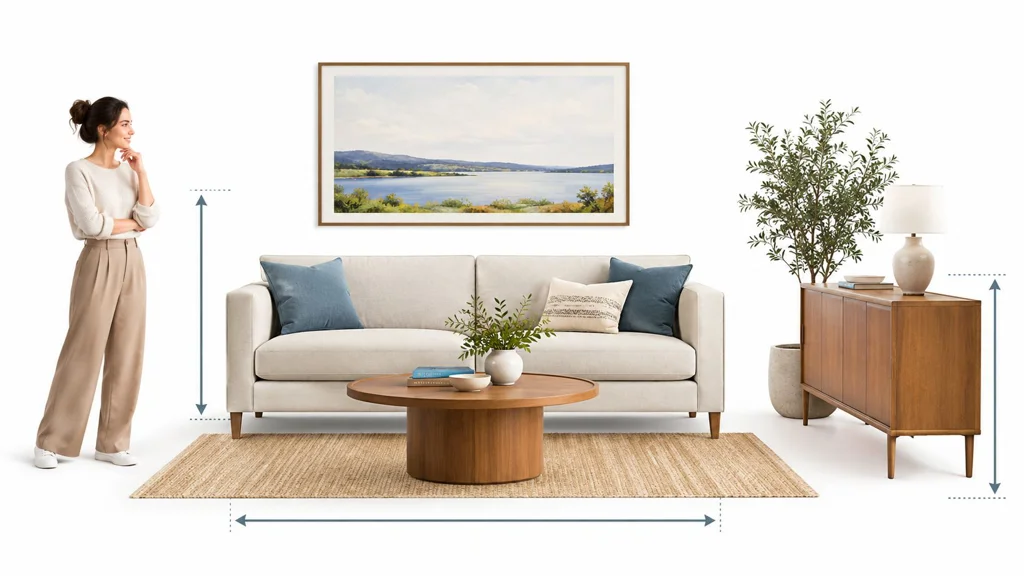
Judge visual weight, not just dimensions
Two pieces can occupy the same amount of floor space but create very different impressions. A closed, floor-skimming bedside cabinet looks dense. A slim wall-mounted shelf or leggy table leaves the floor line continuous and allows the eye to travel underneath.
Use these comparisons when selecting pieces:
| Heavier choice | Lighter alternative |
|---|---|
| Tall, ornate headboard | Simple, low headboard or no headboard |
| Solid bedside cabinet | Floating shelf or narrow table on legs |
| Wide, low dresser | Tall storage with a restrained footprint |
| Floor-length upholstered bench | Open stool or no bench |
| Bulky armchair | Remove the chair unless it serves a clear purpose |
Storage should do more than hold possessions. A bed with concealed storage can replace another freestanding unit, while a wardrobe that uses vertical space can preserve more visible floor. Choose pieces that consolidate functions, but don't use “storage” to justify adding furniture the room doesn't need.
For broader layout and styling references, the interior design feature is useful when comparing how furniture style affects the perceived openness of a room. Before buying anything, tape the proposed footprint on the floor and walk the route from the door to the bed, wardrobe, and window. If the path feels awkward with tape, a real piece won't solve it.
Painting for Spaciousness Without Boredom
The lightest possible paint isn't automatically the most spacious choice. What matters is the room's overall atmosphere, including the wall, ceiling, trim, bedding, curtains, and the way daylight moves across them. Light colors can make enclosed spaces appear larger, while dark colors can make walls feel closer. Interior perception research finds that surface brightness changes how people judge width, depth, and ceiling height (experimental research on color and interior space perception).
A pale blue-gray, soft mineral tone, or quiet warm neutral can create openness without making the room feel clinical. Test the paint in the actual bedroom, because a color that looks airy in a bright showroom can appear muddy beside a shaded window.
Keep the boundaries quiet
A closely related palette across walls, trim, and ceiling reduces abrupt visual breaks. The eye encounters fewer hard edges, so the room feels less segmented. That doesn't mean every surface must match exactly. Varying texture, sheen, and fabric can add personality while the color relationships remain calm.
Avoid using a dark accent wall behind the bed just because it feels dramatic in a larger room. In a compact bedroom, that wall can become a visual stop that pulls the bed forward and shortens the apparent depth. If you want contrast, introduce it through a small artwork, a textured throw, or a muted lamp base rather than a saturated block of paint.
Paint the ceiling and trim in a related tone when the architecture allows it. This softens the transition between vertical and overhead surfaces, particularly where a sharp white ceiling would otherwise emphasize the room's box-like shape. Keep the bedding within the same color family, too. A bright, high-contrast duvet can undo the calm created by the walls by turning the bed into a dominant visual island.
Strategic Mirror Placement and Reflection
A mirror enlarges a small bedroom only when its reflection earns the space it occupies. Aim it at daylight, an open passage, or a calm architectural feature. Aim it at a dark wardrobe, an overflowing chair, or a blank wall, and the room's clutter or emptiness appears twice. The glass changes the sight line, but it cannot improve what that sight line reveals.
Place the mirror adjacent to the window rather than directly opposite it when a straight reflection would create glare. This position can catch daylight and return it into the room without creating a harsh bright spot. Research on light distribution and perceived spaciousness supports testing illuminated wall patterns as part of a broader depth strategy.
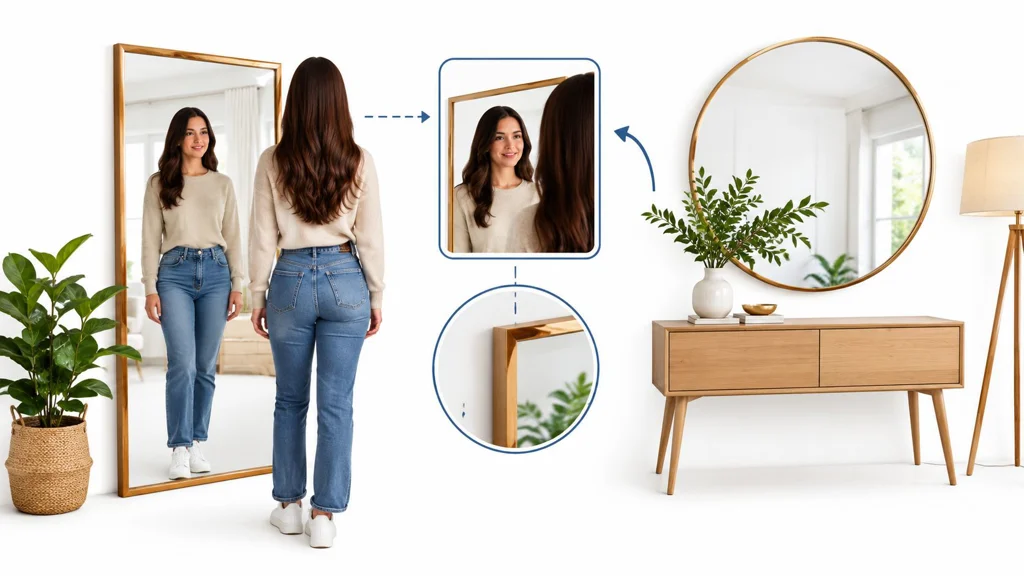
Compare the placement options
A floor mirror leaning against a clear wall adds height without introducing another cabinet or table. It also lets you test several angles before fixing the layout. Keep its base out of the walking route, and secure it to the wall according to the manufacturer's instructions.
A wall-mounted mirror uses no floor area and gives the composition a cleaner edge. Mount it only after checking the reflected view from the doorway and bed. Mirrored wardrobe doors can combine storage and reflection, but they add visual activity when the room already contains patterned bedding, open shelves, or multiple finishes.
Use one substantial, well-aimed mirror rather than a cluster of small decorative mirrors. Several small surfaces create fragmented highlights, extra edges, and competing focal points. In a cramped room, that visual weight can make the walls feel busier even when the floor remains clear.
Stand at the doorway and beside the bed before committing. Check three sight-line questions:
- Does the mirror catch daylight or only a blank surface?
- Does it reveal a clean, useful part of the room?
- Does it extend the room's view, or introduce glare and visual noise?
For listing imagery, virtual staging tools can compare a mirror, a different bed position, or lighter furniture before you move anything. Keep the proposed arrangement plausible. A mirror can suggest depth, but furniture that blocks the route still makes the bedroom feel small.
Layering Light to Eliminate Shadows
A small bedroom can feel cramped even with appropriately sized furniture if the ceiling light leaves the bed, wardrobe, or doorway in shadow. Those dark patches make the room's boundaries stand out. Arrange light across the room's full volume, so the eye can follow the walls and circulation route without stopping at heavy contrast.
Use three lighting jobs. Ambient light sets the general brightness. Task light supports reading, dressing, or working. Accent light directs attention to a wall, texture, or vertical feature, adding depth after daylight fades. The goal is controlled distribution, not identical brightness on every surface.
A wall sconce beside the bed can replace a bulky table lamp and keep a narrow nightstand usable. A compact pendant can draw the eye upward, provided it hangs high enough to avoid becoming a visual obstruction. An upward-facing floor lamp can wash the ceiling and strengthen the room's vertical sight-line, though its base still needs to stay outside the main walking route.
Treat shadows as layout problems
If the darkest corner is beside the wardrobe, inspect the arrangement before adding another lamp. The wardrobe may be too deep, its door may open into the corner, or a tall piece may be blocking light from the window. A fixture can soften that problem, but it cannot remove the visual weight of furniture that crowds the room.
Use sheer window treatments when privacy allows, and keep heavy fabric away from the glass during photographs or viewings. Preserve the clearest daylight path through the room. A mirror beside that bright axis can help distribute light, but check its reflection from the doorway and bed so it does not introduce glare or a distracting view. Brightness and darkness can change perceived depth according to how they are distributed across the room (lighting and spatial perception findings).
Vertical cues also shape the room's perceived volume. Full-height curtains, a tall lamp, or slim artwork gives the eye an uninterrupted route upward. Keep the lower third quieter by limiting baskets, low shelves, and exposed cables. A clear floor paired with light on the upper walls reduces visual weight at eye level and makes the bedroom feel taller without adding another object.
Taking It From Concept to Completion
A cramped bedroom rarely improves through one dramatic purchase. The reliable process is sequential: remove what blocks the room, test the furniture scale, settle the palette, then refine light and reflection.
Begin by photographing the room from the doorway, the bed, and the main circulation route. Remove the nonessential furniture and photograph it again. The comparison often reveals that the room needed subtraction before it needed a new color or accessory.
Use a controlled staging sequence
- Clear the volume. Remove surplus furniture, exposed storage, laundry, and decorative buildup.
- Test the bed position. Use tape or temporary markers to check the walking path and the view toward the window.
- Choose the lightest practical furniture. Favor low profiles, visible legs, floating surfaces, and storage that replaces another unit.
- Paint after layout decisions. The chosen bed and wardrobe affect how the color reads, so don't select paint in isolation.
- Add one reflective surface. Test its view from more than one position before fixing it permanently.
- Balance the lighting. Address dark corners and blocked daylight rather than adding lamps at random.
For a property listing or renovation decision, the guide to staging a home virtually offers a practical way to preview furniture removal, color changes, and alternative layouts before moving physical pieces. RoomStaging can generate photorealistic interior redesigns and virtual staging from a room photo, with the aim of preserving the visible architecture, openings, and proportions in the original image.
The final test is simple. Enter the bedroom as a buyer would, stop at the doorway, and follow the natural route to the bed and window. If your eye moves smoothly through the space, the room feels calm and legible. If it keeps catching on bulky furniture, dark corners, or scattered objects, keep editing.
RoomStaging lets you visualize small-bedroom layouts with virtual staging, interior redesign, furniture removal, and lighting or color changes before you rearrange the physical room. Upload a bedroom photo, test a lighter, lower-weight arrangement, and compare the result by visiting RoomStaging.